
We will be outlining the steps of teak deck removal on a Grand Banks 32. This is a current job in our service yard and many people would like to know more about the steps involved. Since we are doing this job as part of a larger project, the actual painting of the decks will probably occur later after some of the 0ther work is done.
Phase One.
The first step after deciding you want to remove your decks is to remove all the bungs and screws from the deck. This may be the most time consuming job of the whole process. It is also hard on the knees and back! After this part is done you can progress with the actual teak removal.
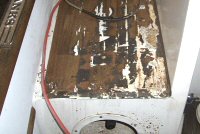
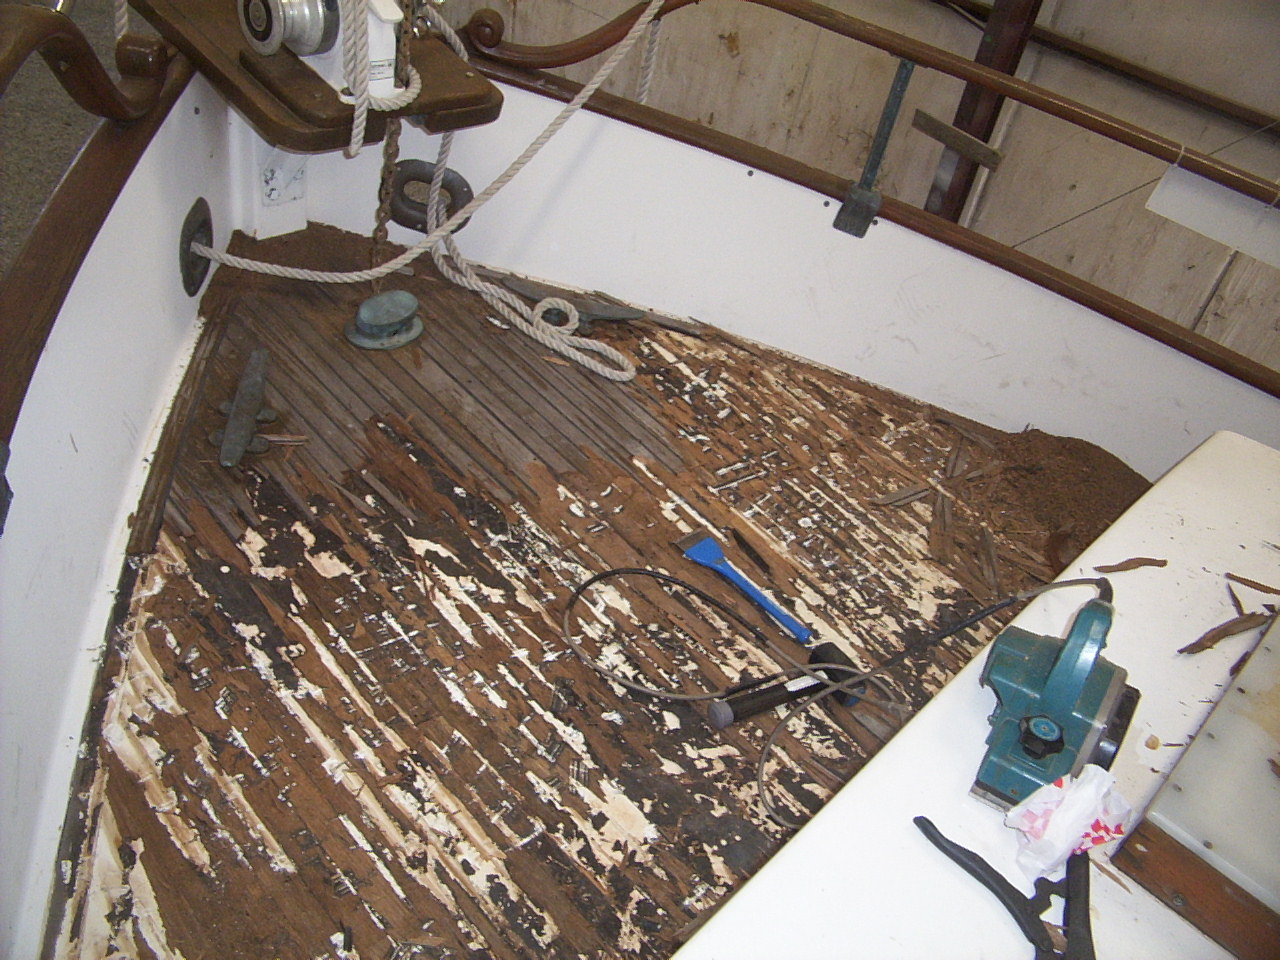
The teak is most likely bedded with 3M5200 or comparable bedding. This is good if you are going to keep your decks – bad if you want to remove them. On some adhesives, floating a little acetone under the teak helps release the bond, but on 5200 it has little effect. We have, in the past, removed the decking with a combination of a heavy duty floor scraper and a shovel. On this job, however, we are using an electric hand planer. We started out with the blade set as deeply as possible and then on each progressive pass we retract it a bit. This gives a lot of control and lessens the chances of tearing up the fiberglass substrate.
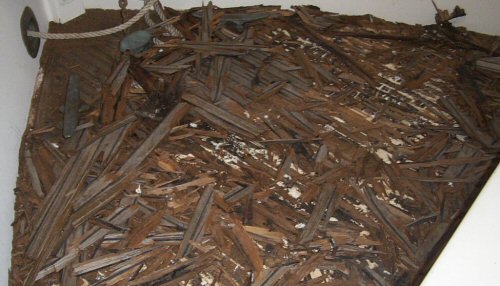
Be prepared for some massive cleanup! Between the debris and the dust you will have one heck of a mess. Be sure to wear protective goggles, dust masks and a paper suit. It also helps to keep a trash can close at hand and keep picking up as you go.
Once the brute work is complete, it is time to fine tune. After getting down to a few splinters and adhesive, we switched over to a heavy duty sander with some coarse grit paper. Here you have to know when to stop. Our goal was to minimize the damage to the fiberglass, yet leave it ready to accept paint. After most of the adhesive is gone, we step down to a less aggressive grit. You will need a lot of paper as it gums up quite a bit from the adhesive. After this sanding, you will be left with a good surface – only one more sanding to go!
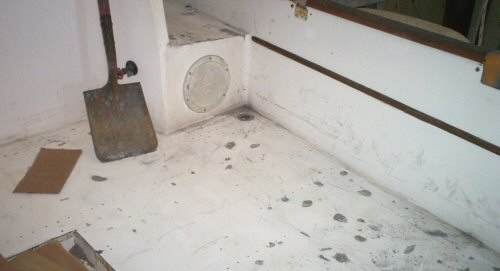
When you have a surface that looks like the one above, you will need to fill all the holes from the screw removal. It is important to use a filler that will not shrink. We are using West Epoxy with some thickeners in it. We over fill the whole and give it plenty of time to set. With West, any shrinkage will occur while it sets and then it will stop. Then we can fine sand the epoxy flush with the deck.
Next:
painting the surface.
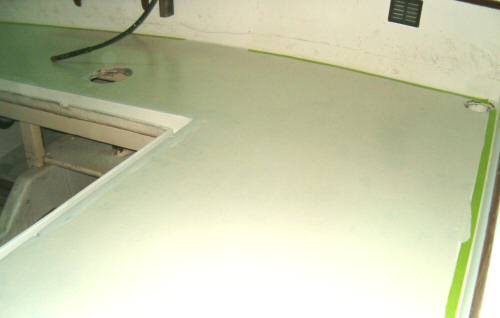
We begin by using a high build primer on the whole deck. The reason behind this is that we want to end up with a smooth surface. When the boat was new, this was not really a concern as Grand Banks was putting down teak decks on the surface. At that time, all the boats got teak decks and the mold had lots of irregularities because it was not necessary for it to be totally flat. Now we have to reconcile this deficiency.
After the high build is sprayed on, we have to sand flat. I was surprised to see how little primer was left after the initial sanding – which means there was a lot of irregularity in this surface. When we are satisfied that the surface is flat, we have to prime again to have something the new paint will stick to. Since the toe molding along the cabin sides had left a considerable mess when removed, we also had to spray up the side of the cabin about an inch high. We could have created a new molding to put there, but we were trying to eliminate trim – not add more.
After the final coat of primer is applied it is time to paint. Now this will be done in two steps to create the small white border around the edges of the non-skid. We tape to just above the old toe railing on the cabin sides and coaming and spray the matching white paint along the edges. It is not important to worry about the walking surface because this will be painted with the colored non-skid paint. We do paint in about 6 inches to allow enough room to add the tape border for shaping the walking area.
We now tape off for the nonskid surface which is usually curved at the corners and around hardware. It takes a lot of time to get this to look right. After the outline is laid out, you have to apply masking paper outboard of all this area to avoid the overspray. The nonskid is sprayed on just like the regular paint. We have tried rolling this area, but the nonskid is too irregular and often “clumpy” so using the spray gun gives you a more consistent distribution of the nonskid.
Along with the above, you will have to do something with the lazarette and any other insertions in the deck. See our
custom GB lazarette hatches.
Now that the deck is painted, you can enjoy the maintenance-free decks. Remember however, nothing is totally maintenance free. You will probably need to touch up this paint from dropping items on the deck or other abusive use, although normal walking and cleaning will not harm the finish.
Read an article from a GB owner about his experience with having teak decks removed.
All Decked Out – PassageMaker Magazine
 We will be outlining the steps of teak deck removal on a Grand Banks 32. This is a current job in our service yard and many people would like to know more about the steps involved. Since we are doing this job as part of a larger project, the actual painting of the decks will probably occur later after some of the 0ther work is done.
Phase One.
We will be outlining the steps of teak deck removal on a Grand Banks 32. This is a current job in our service yard and many people would like to know more about the steps involved. Since we are doing this job as part of a larger project, the actual painting of the decks will probably occur later after some of the 0ther work is done.
Phase One.
