When I ended
Part II we had just removed the cabin module from the mold. We have gone way past that point now. The module has been permanently installed and the hardtop has also been glassed on.
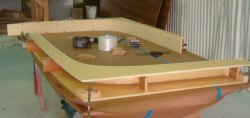
Even though we had taken careful measurements and the mold was perfect, the flanges still needed a bit of work to ensure a good fit to the existing boss. The attachment was made with both 3M5200 and mechanical fasteners for a permanent bond. The top itself was tabbed on with 1708 glass tape and resin – no problems with longevity there.
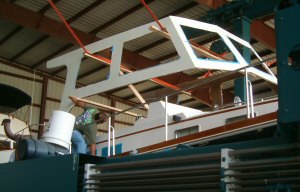
Since the first one is always a design in progress, we decided that for running air conditioning, wiring and to add visual interest, we needed to add an arch to the aft end of the helm area. This will also allow us to add tracks for a back enclosure – so it serves many purposes. The arch is made from Core Cell foam with fiberglass inside and out.
With the decision to add the arch, some more engineering was needed to blend this into the existing structure. Some cutting was needed on the corner of the settee back – which needed to be done also to run AC duct work. After installation, there are hours of blend work, fairing and finishing before it looks like a natural extension of the existing structure – which is absolutely necessary to make this project work.
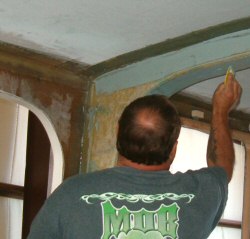
We had originally intended to use teak veneer for the interior cabin sides but decided that using something with a bit more thickness would create a flatter surface without all the extra fairing the raw fiberglass would need to accept veneer. We now do the interior with thin teak plywood, which is much easier to work with in addition to the labor saved on the fairing. Of course, when most of the cabinsides are windowed, there is a lot of waste in the sheets that has to be expected to keep the continuity of the grain. We prefinished the plywood to save time at the end, where only a final coat will be needed (to the dismay of the carpenter – who has to be very careful while cutting and installing).
The windows are custom built and have flanges both inside and out, so not much of the teak will show. We were careful to measure the cabin side thickness to have tight fitting windows – which is easier when you have them custom fabricated.
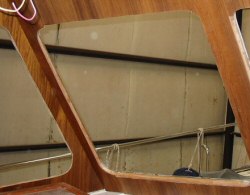
Before installing the windows, we will run a router around the holes to get the plywood totally flush with the fiberglass hole.
The wiring that was run up through the arch needed somewhere to go, so we added a teak wire chase down the centerline of the top. This chase will also have a teak handrail mounted the length of the helm area for safety reasons.
On to Part IV
View the slideshow of this project to date.
